Thinking about getting solar panels but not sure what actually happens when they go up on your roof? You're not alone.
For many UK homeowners, the idea of generating your own electricity is exciting — but the installation process can feel like a bit of a mystery and even a bit daunting at first. This guide walks you through exactly what happens when you decide to go solar, from assessing your roof to flicking the switch and powering your home with the sun.
Let’s break it down, step by step.
Every Home Is Different
While this guide covers the general process most UK homeowners can expect, every solar installation is unique. The exact steps, timelines, and system components may vary based on your roof type, energy needs, property layout, and whether you're adding extras like a battery or EV charger. Your installer will tailor everything to suit your home and goals.
Is Your Roof Suitable?
Understanding roof suitability for solar panels is the first step toward a smooth installation. Before anything is installed, a professional will need to check whether your home is right for solar. Here’s what they’ll look at:
- Roof direction and angle: In the UK, a south-facing roof is ideal, but east or west can still work well. A roof pitch of around 30–40° tends to deliver the best performance.
- Shade: If your roof is regularly shaded by trees, chimneys, or nearby buildings, it can impact how much energy your system generates. Optimisers can be installed to help mitigate this.
- Size and condition: Your roof must be large enough to support the panels. If tiles are loose or the structure is ageing, it might need repairs first.
Your installer will usually conduct a site survey to check viability before moving forward.
Choosing the Right Solar Setup
Once your roof passes inspection, it’s time to design a solar system that fits your home, lifestyle, and energy goals.
This step is all about tailoring the technology to you. Your installer will recommend the right combination of panels, inverter, and optional extras like battery storage or an EV charger — ensuring your system is as efficient, future-ready, and cost-effective as possible.
Here’s what you’ll be deciding on:
- Solar panel type: Most UK homes use monocrystalline panels because they’re efficient and compact — great for smaller roofs.
- Inverter choice: The inverter turns solar energy (DC) into usable electricity (AC). You can choose a standard string inverter or microinverters, which help optimise performance if your roof has partial shade.
- Battery storage (optional): Want to store energy for use in the evenings? A solar battery lets you do just that.
Installation Day: What to Expect
The big day is here — your solar panel system is ready to be installed, and you’re probably wondering what to expect. Most domestic installations in the UK are completed in just one to two days. A professional team will arrive with all the equipment and walk you through the plan before they get started. While they’ll be working on your roof and in parts of your home (like your garage), the process is surprisingly straightforward and safe with minimal disruption.
A Quick Note Before We Dive In
Every solar installation is slightly different. Your roof size, electrical setup, and energy usage all influence how your system will be designed and fitted. What follows is a general overview—your installer will walk you through the exact process for your home.
Your installer will walk you through each part of the solar panel fitting process, including safety checks, wiring, and system commissioning. Here’s how the day typically unfolds, step by step:
Step-by-Step Solar Installation Process
Step 1: Mounting System Fitted to the Roof
Installers fix a set of rails or brackets to your roof tiles. These are the foundation for your solar panels and are designed to be weather-resistant and discreet.
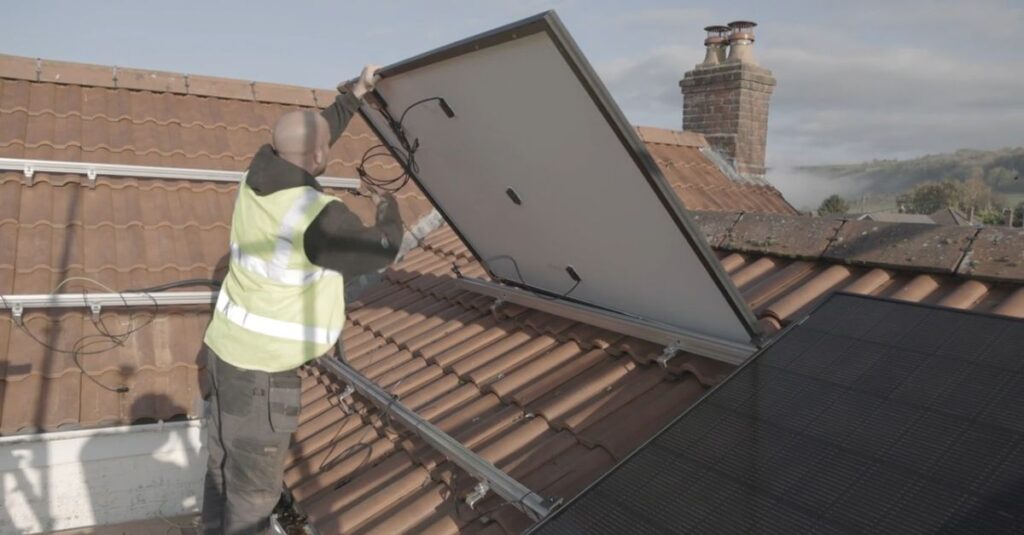
Step 2: Panels Are Installed
Solar panels are then attached to the mounts and carefully aligned to capture the most sunlight. Safety checks are run throughout the process to ensure stability and positioning.
Step 3: Wiring and Inverter Setup
The panels are wired together and connected to an inverter — usually located in your utility room, or garage. The inverter then connects to your home’s electrical system.
Step 4: Safety Checks and Testing
Once everything is in place, your installer will check that the system is working correctly, safely, and efficiently. This includes testing electrical connections and system performance.
Adding a Battery or EV Charger
If you’re including a solar battery, it’s usually installed at the same time as your panels and inverter or soon after. Doing both together can reduce labour costs and ensure everything works seamlessly from day one. Check out our Solar Battery Installation Guide — it breaks down everything you need to know.
What About an EV Charger?
You can also install an EV charger alongside your solar system — or run wiring for one to future-proof your setup. Many smart chargers can even use excess solar power to charge a car. Your installer may suggest running the wiring for an EV charger upfront, even if you’re not ready to install it yet — that way, you're set up for an easier (and cheaper) upgrade later which can utilise the power generated by the panels.
Connecting Your Solar Panel System to the Grid
After installation, your system needs to be officially connected to the grid — but don’t worry, your installer will handle this part.
They’ll notify your local Distribution Network Operator (DNO) and may help you register for the Smart Export Guarantee (SEG), which pays you for any extra electricity you export back to the grid.
If you don’t already have one, a smart meter might be installed to track how much energy you’re producing, using, and exporting. Want to understand exactly what the DNO application involves?
Check out our guide: What Is a DNO Application? — we break down why it’s needed, how it works, and what to expect.
Ready to install solar?
If you’re serious about getting solar, understanding the installation process is a great place to start — and you’re already there.
Joining a group-buying scheme like Solar Together can help you move forward with confidence, lower costs, and connect with trusted local installers.
When homeowners in the same area sign up together, they can access:
- Savings on panels and installation
- Trusted installers vetted for quality and performance
- A smoother process, with expert support from start to finish
Thousands of households across the UK have already gone solar through Solar Together. Register your interest today.
FAQs About Solar Panel Installation
Do I need planning permission?
In most cases, no. Solar panels are classed as "permitted development." Exceptions may apply for listed buildings or homes in conservation areas — but your installer will guide you. You can read our guide on planning permission.
Can I install solar panels myself?
Technically, yes — but it’s strongly discouraged. Solar panel systems must be installed to strict safety and electrical standards, and certified professionals are trained to ensure everything is correctly connected and compliant with UK regulations.
Self-installation not only increases the risk of faults or injury, but it may also invalidate product warranties and make you ineligible for insurance coverage or government incentives. To ensure your system is safe, efficient, and fully covered, we strongly recommend using a certified installer.
How long does solar panel installation take?
The typical timeframe for a solar panel installation in the UK—from initial enquiry to a fully operational system—is 4 to 8 weeks. This duration can vary based on factors such as installer availability, site surveys, system design, and necessary approvals, particularly from your Distribution Network Operator (DNO).